TBStron3D
ELEGOO Neptune 3 MAX Upgrade Kit
ELEGOO Neptune 3 MAX Upgrade Kit
Couldn't load pickup availability
Product features:
1.The installation base is made of aerospace-grade aluminum alloy with CNC processing, good flatness and verticality, high dimensional accuracy, lightweight product, and reduced motor load.
2.The Y-axis adopts a unique structure of double guide rails and double sliders, which makes the Y-axis more evenly and stably loaded. The linear guide rails and sliders are made of high-carbon chromium bearing steel and use electroplating rust prevention technology, with high hardness, wear resistance, smoothness, and good rust prevention ability.
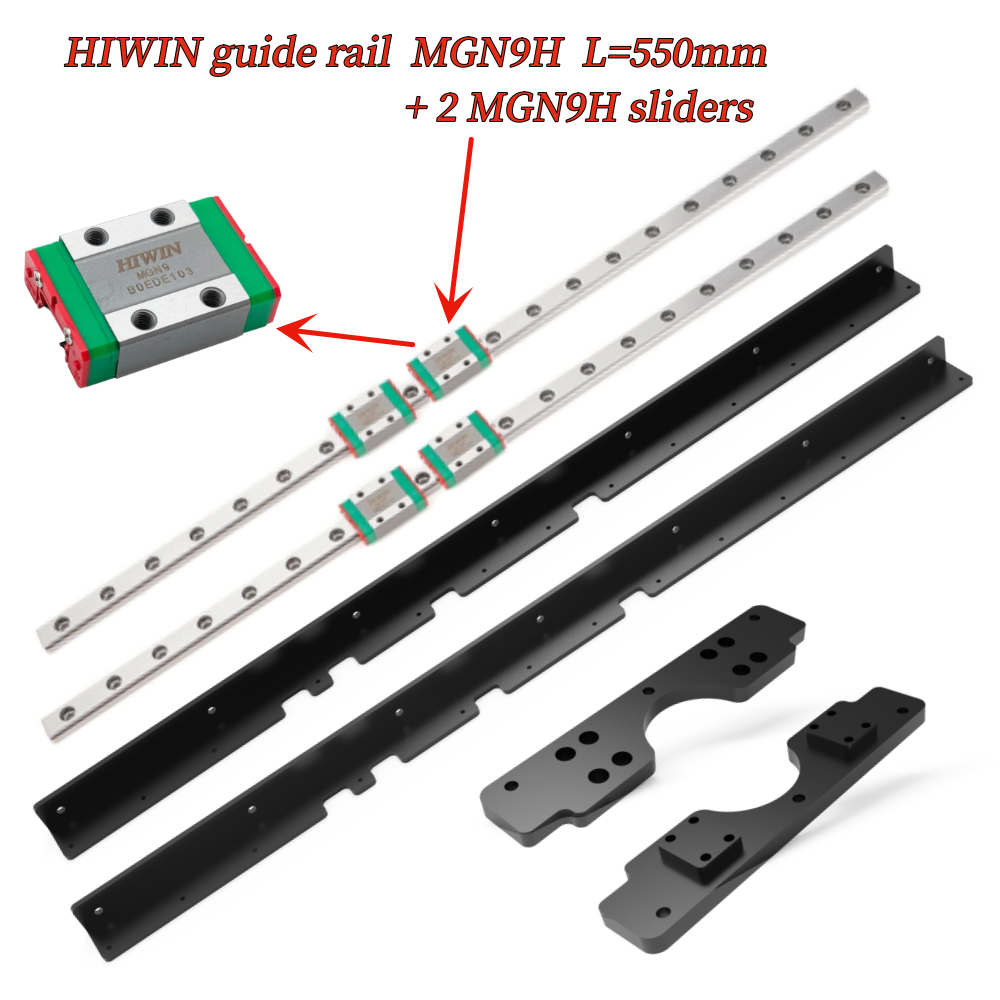
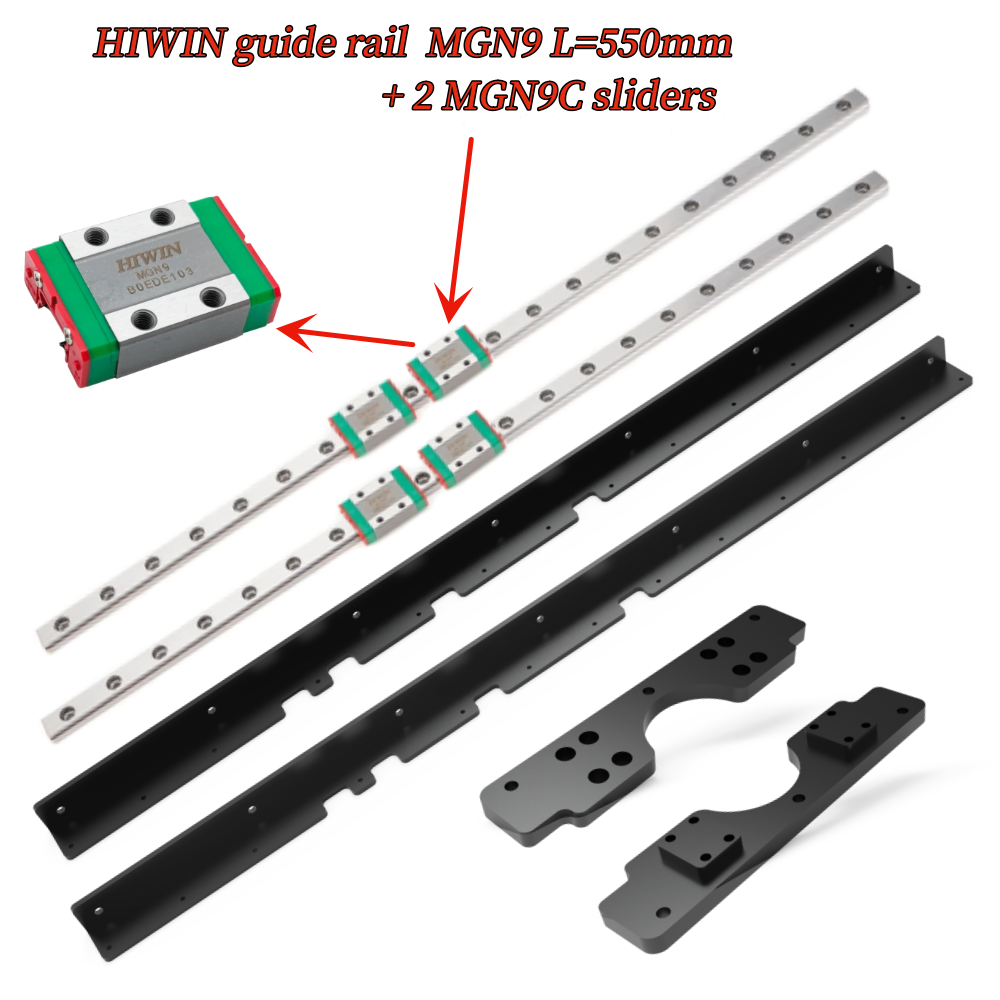
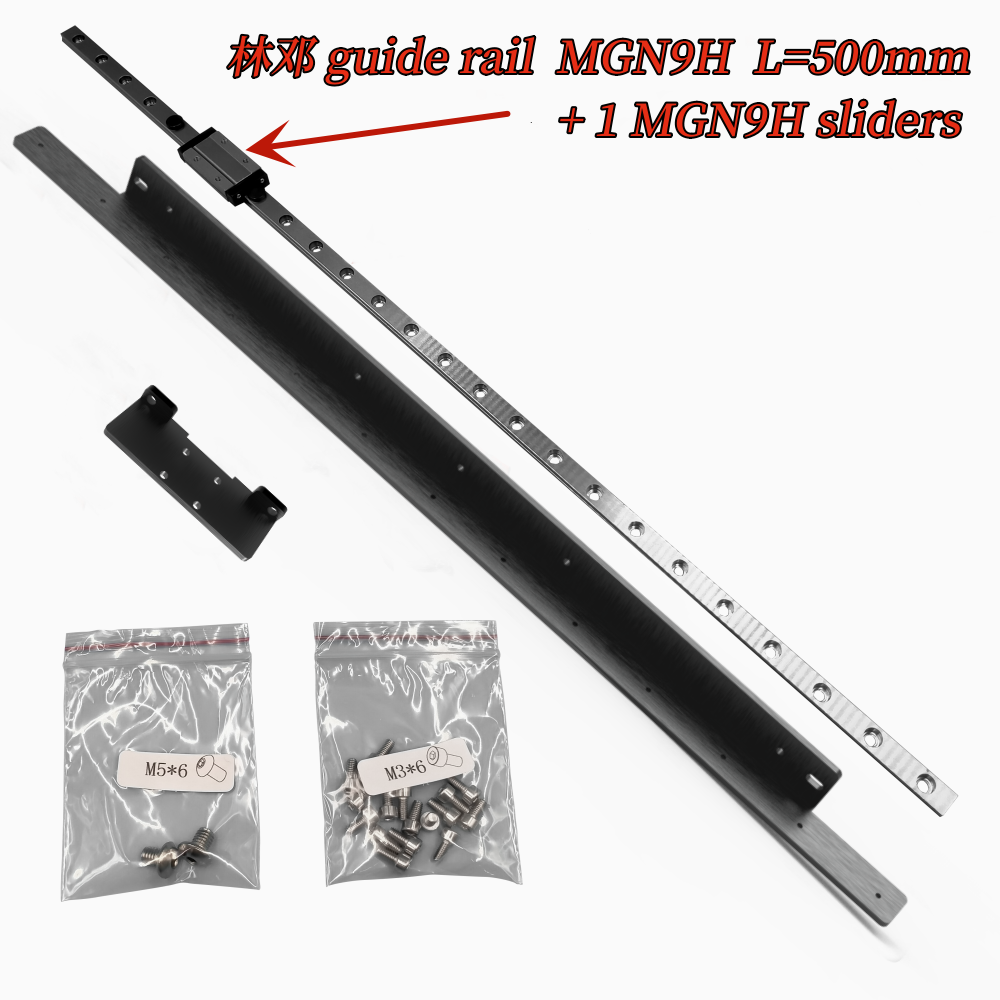
The linear guide models :
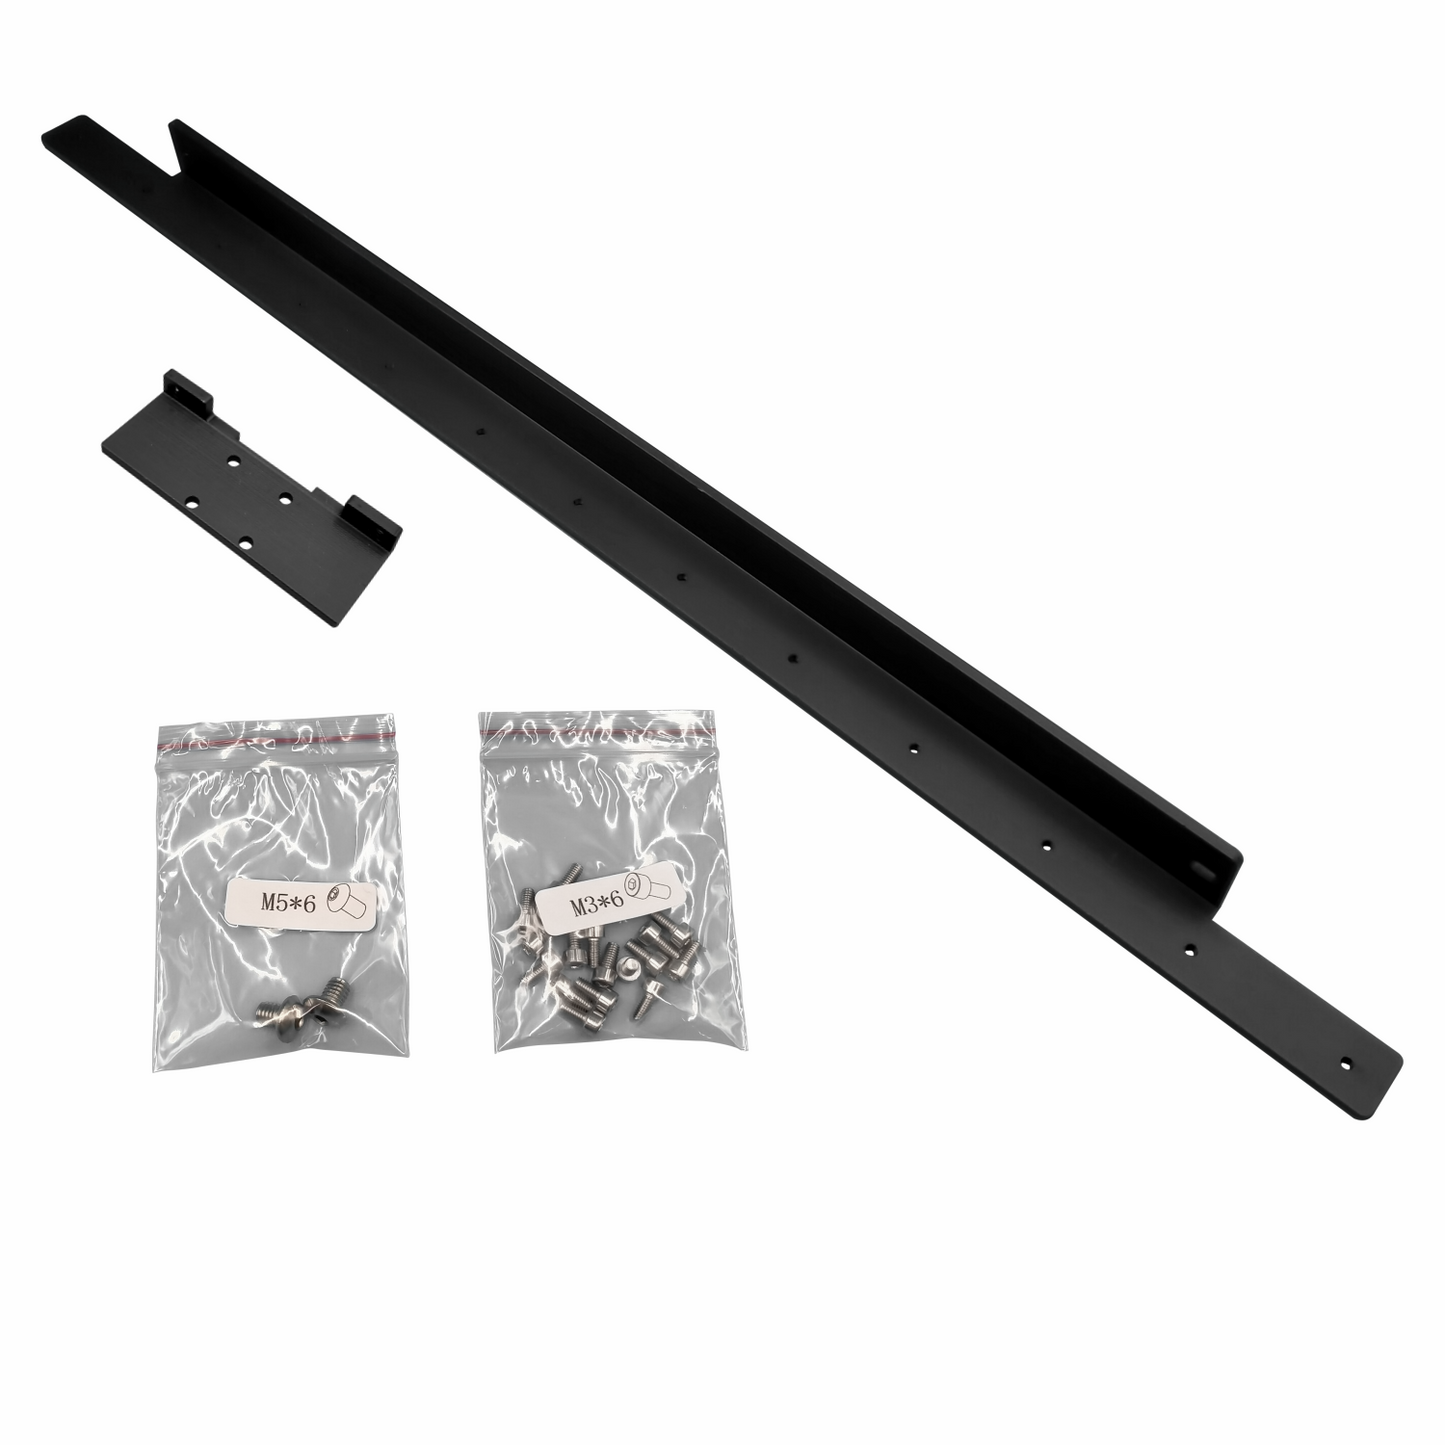
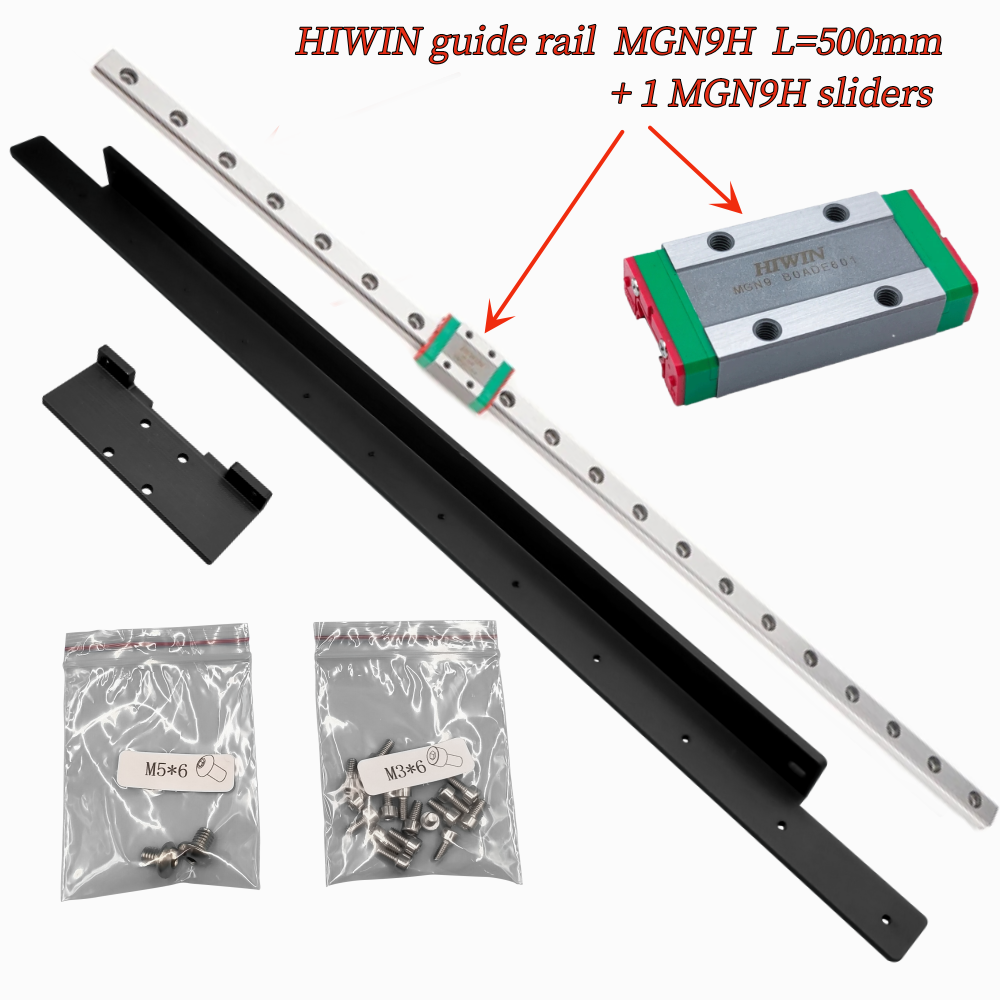
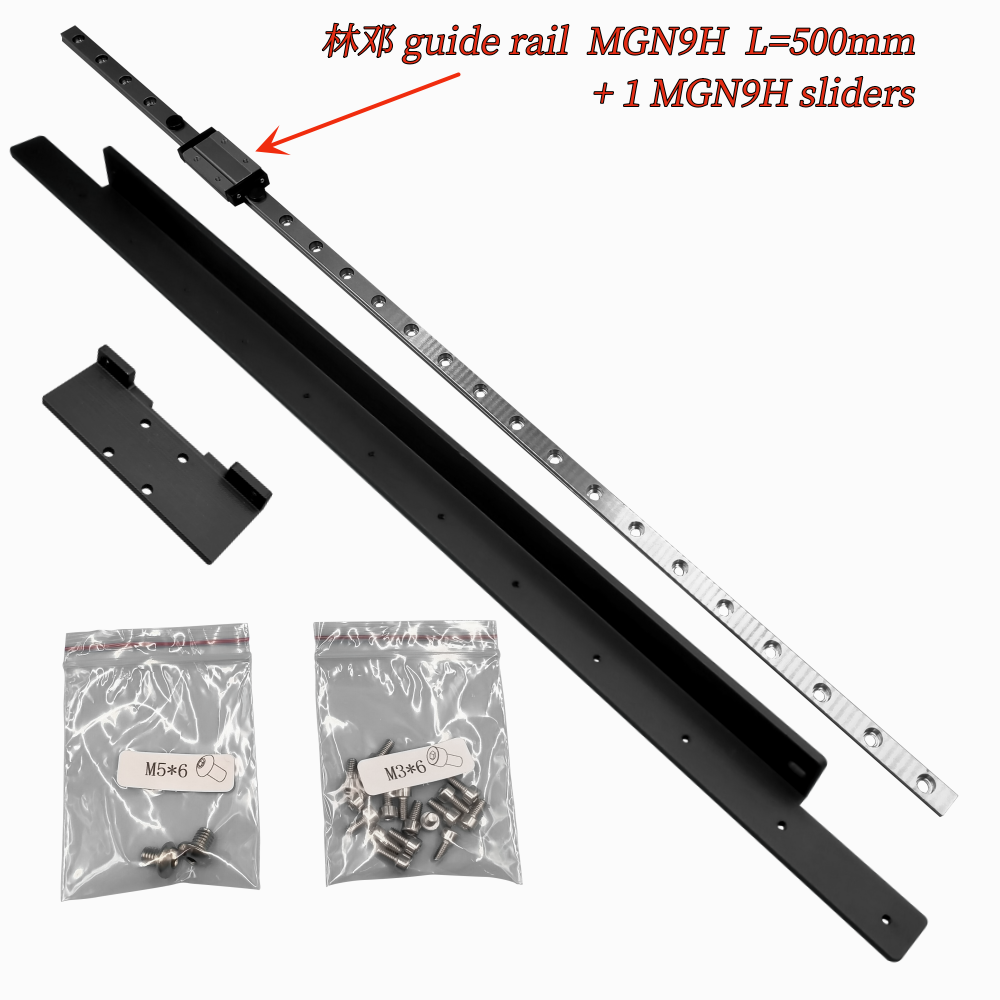
X-axis, MGN 9H, length 500mm, with 1 MGN 9H slider; Quantity: 1 sets.
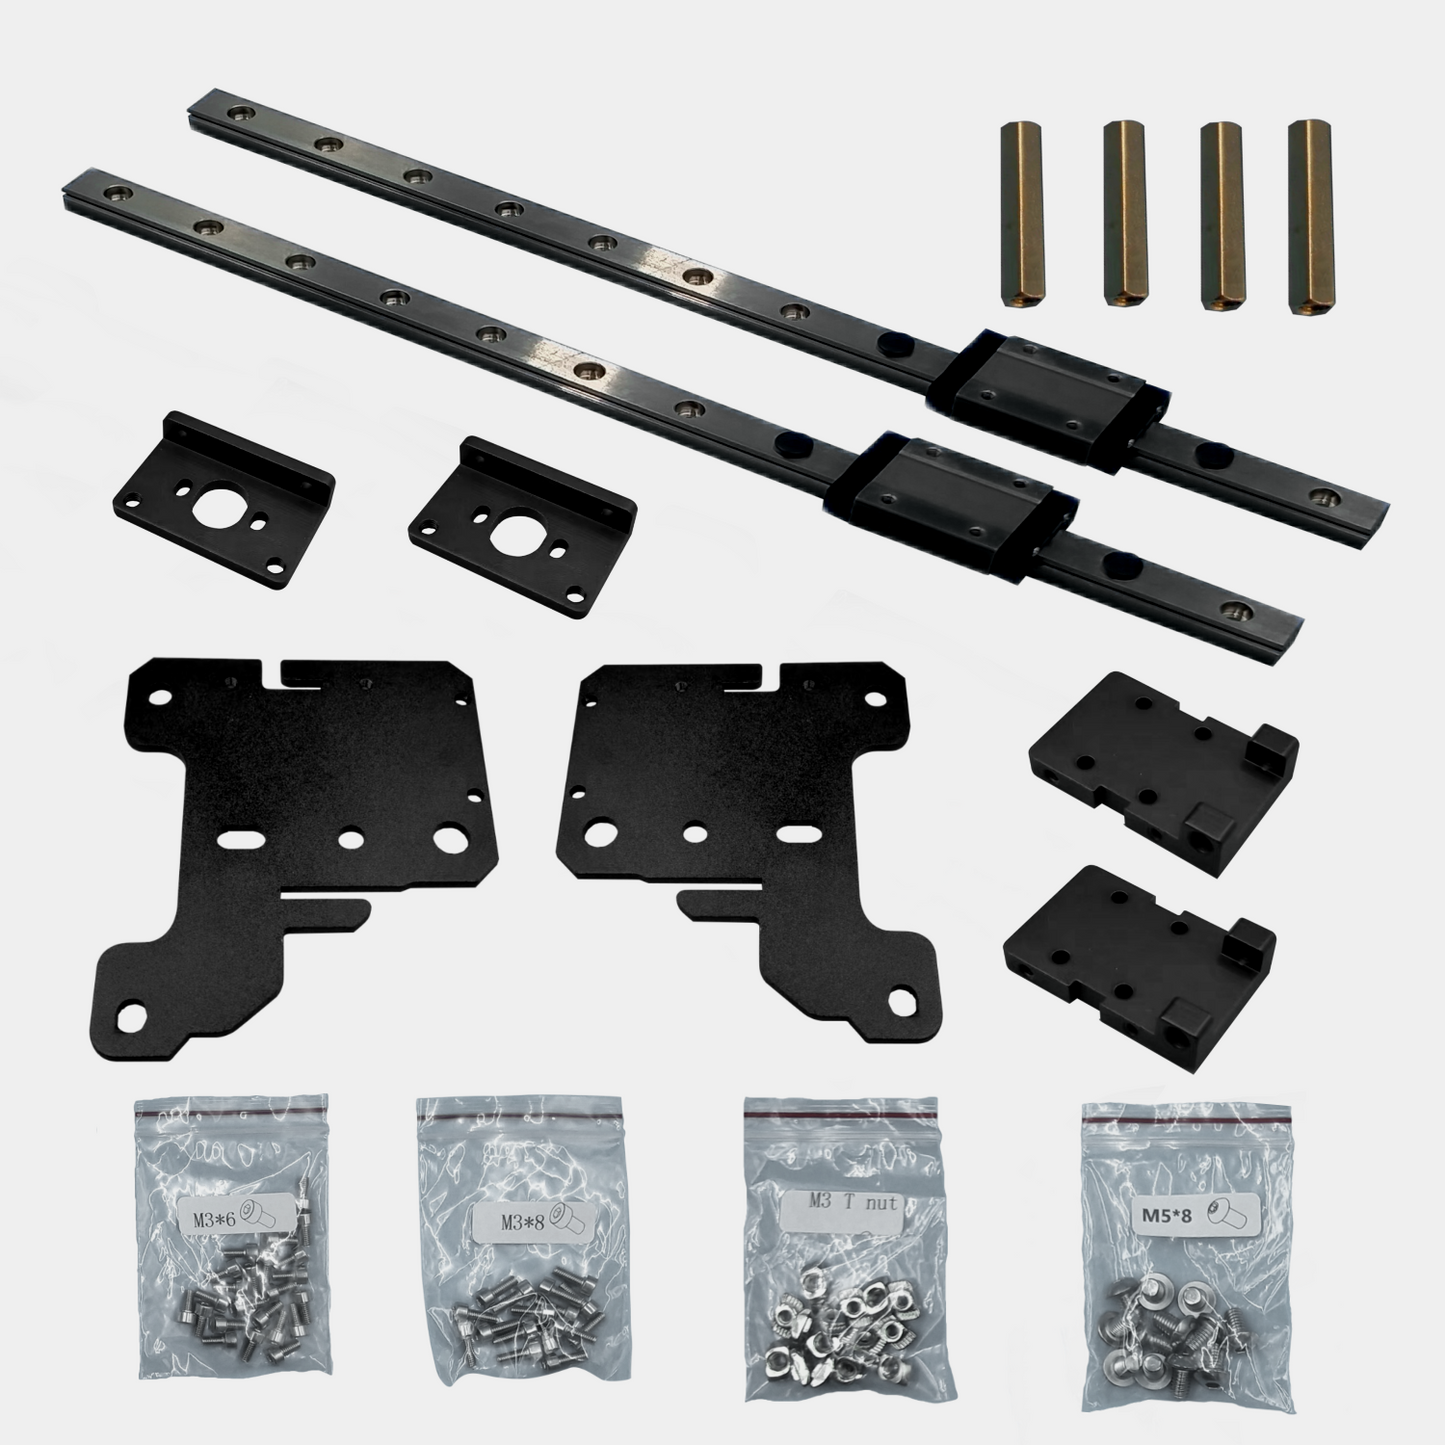
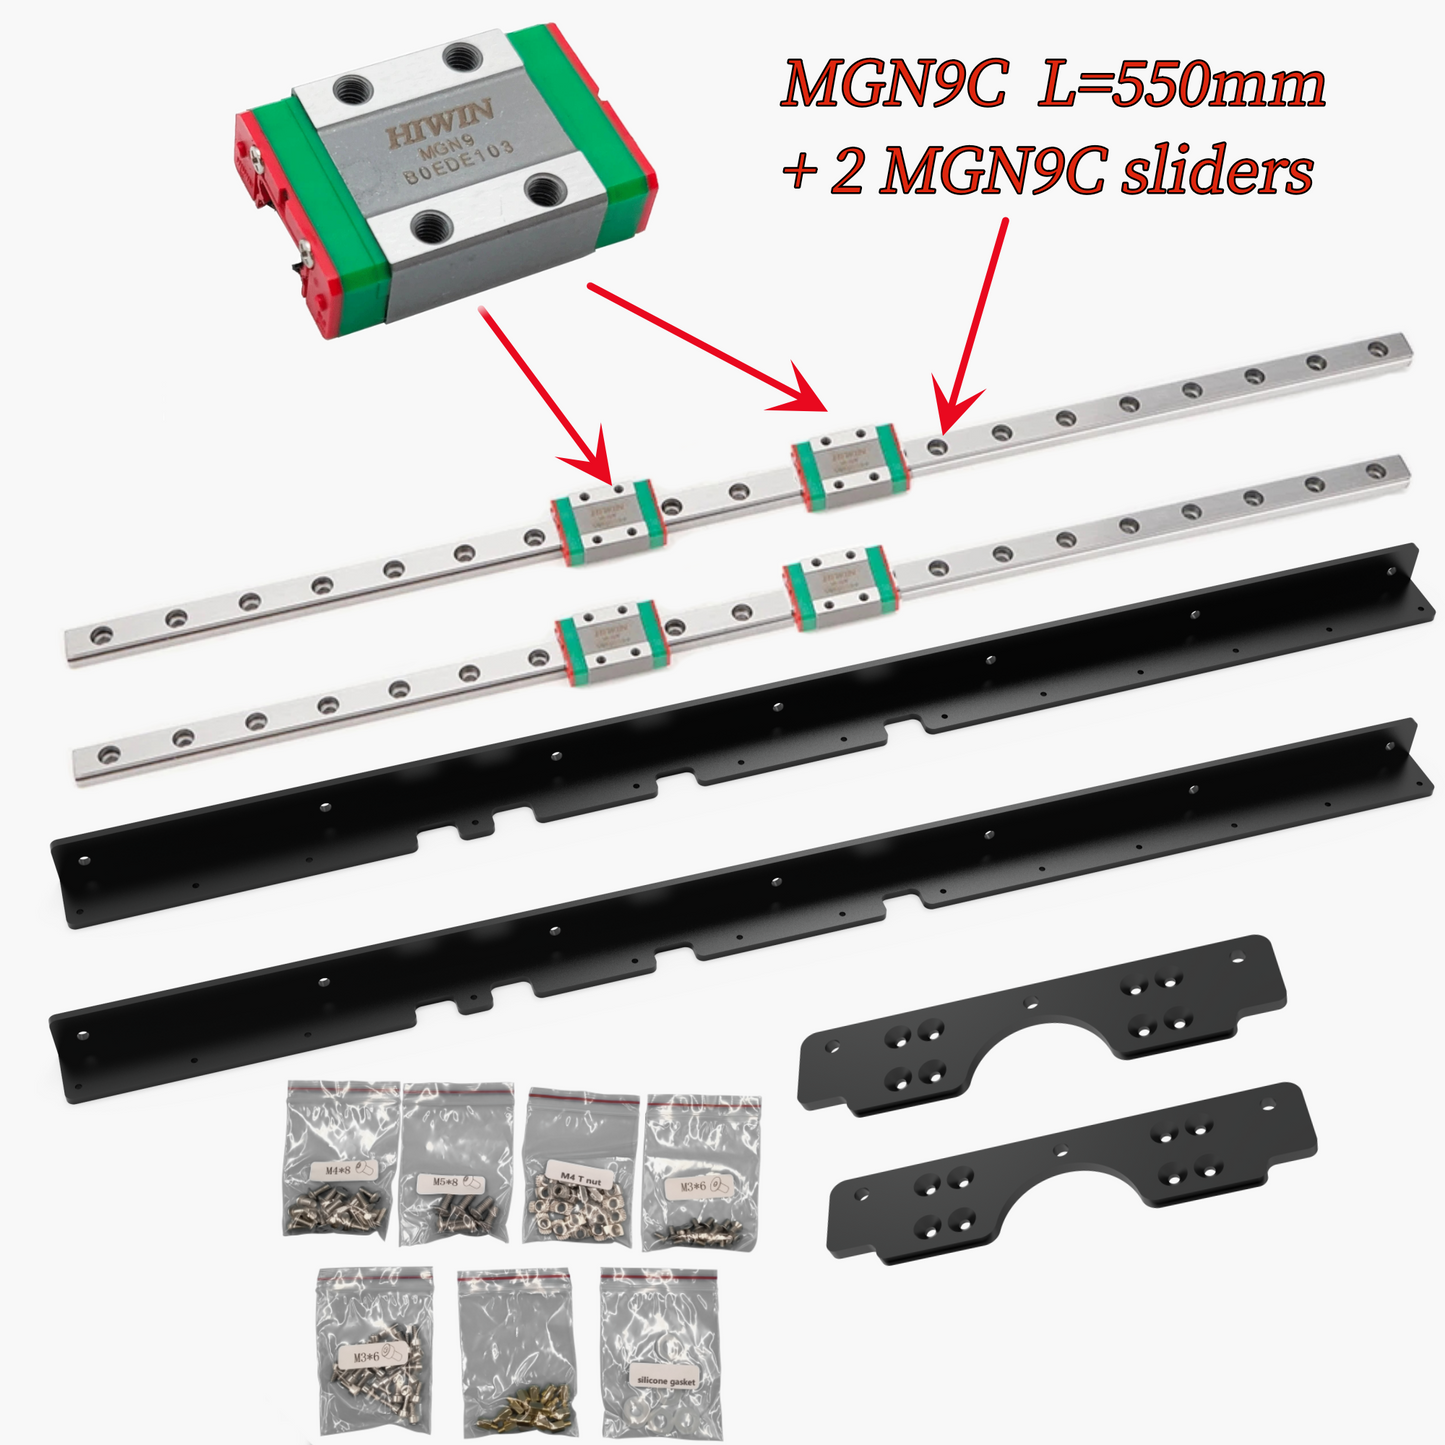
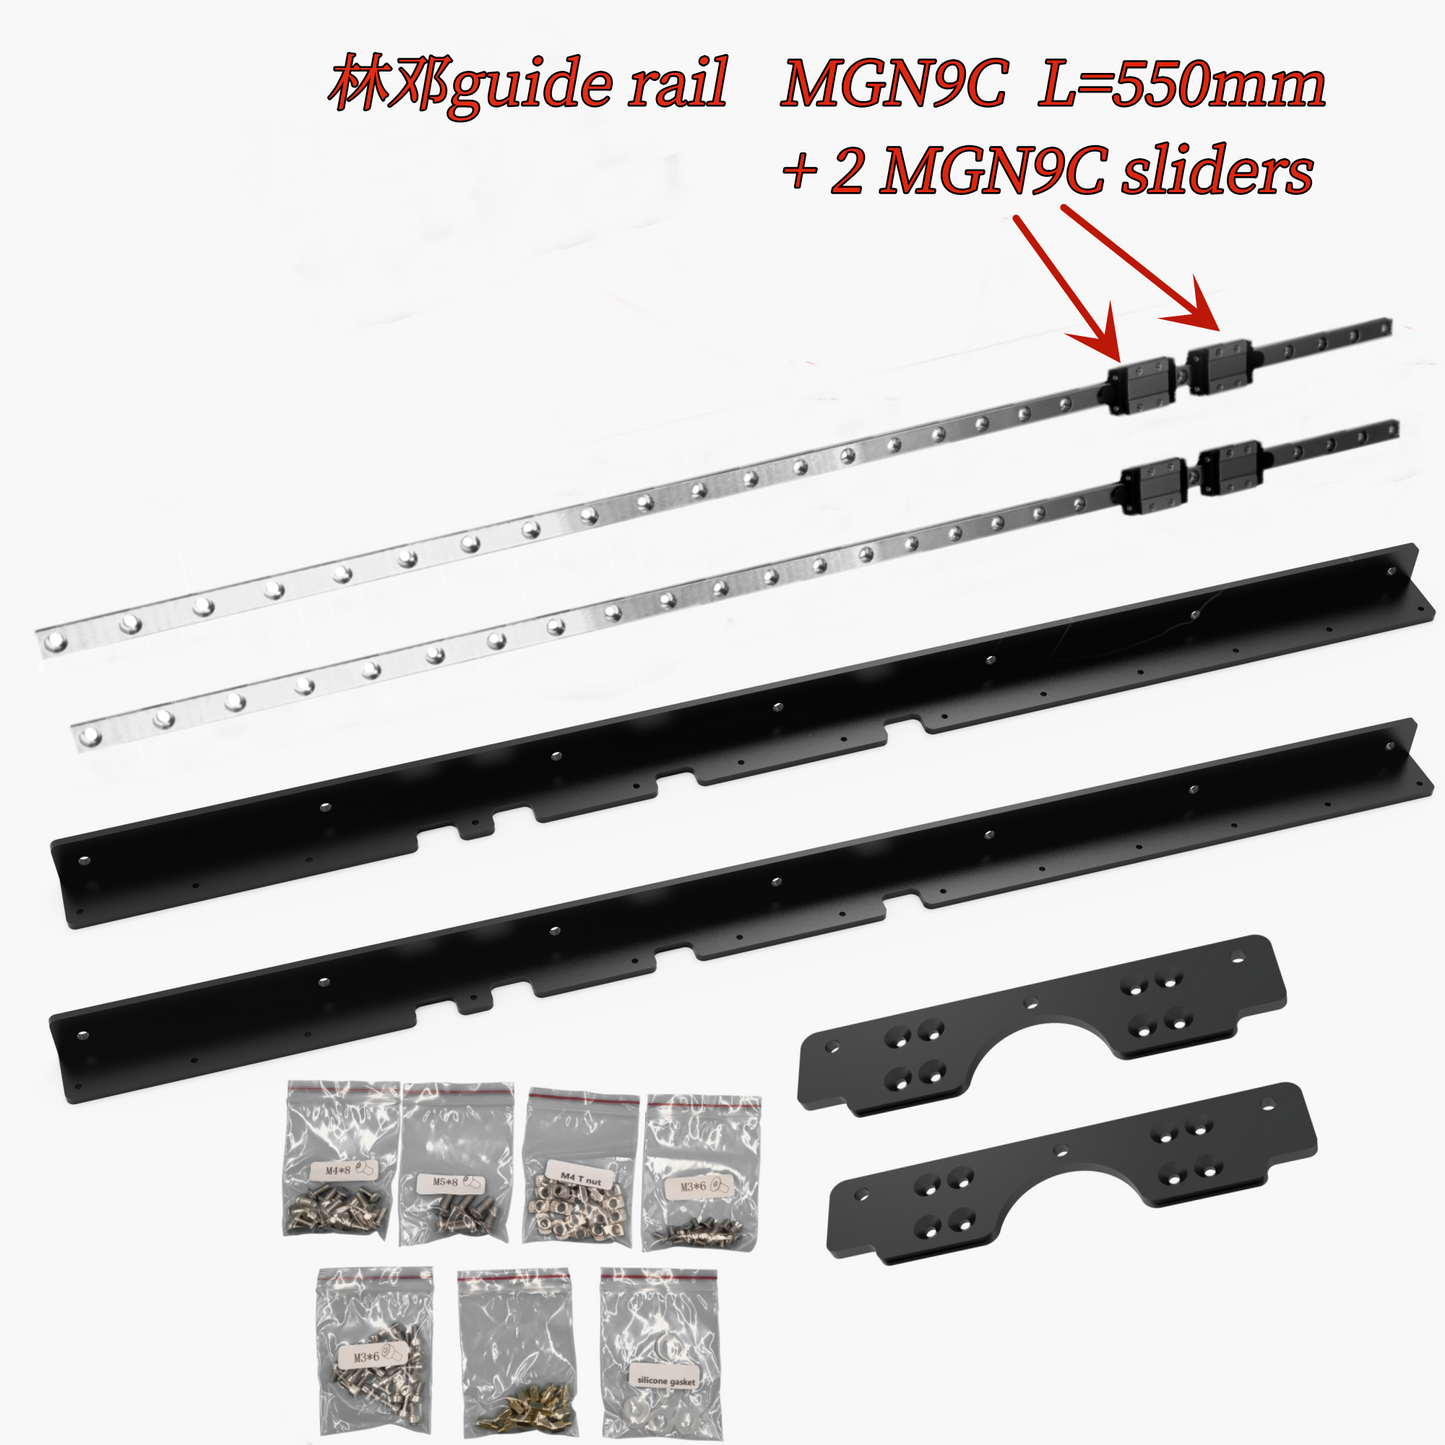
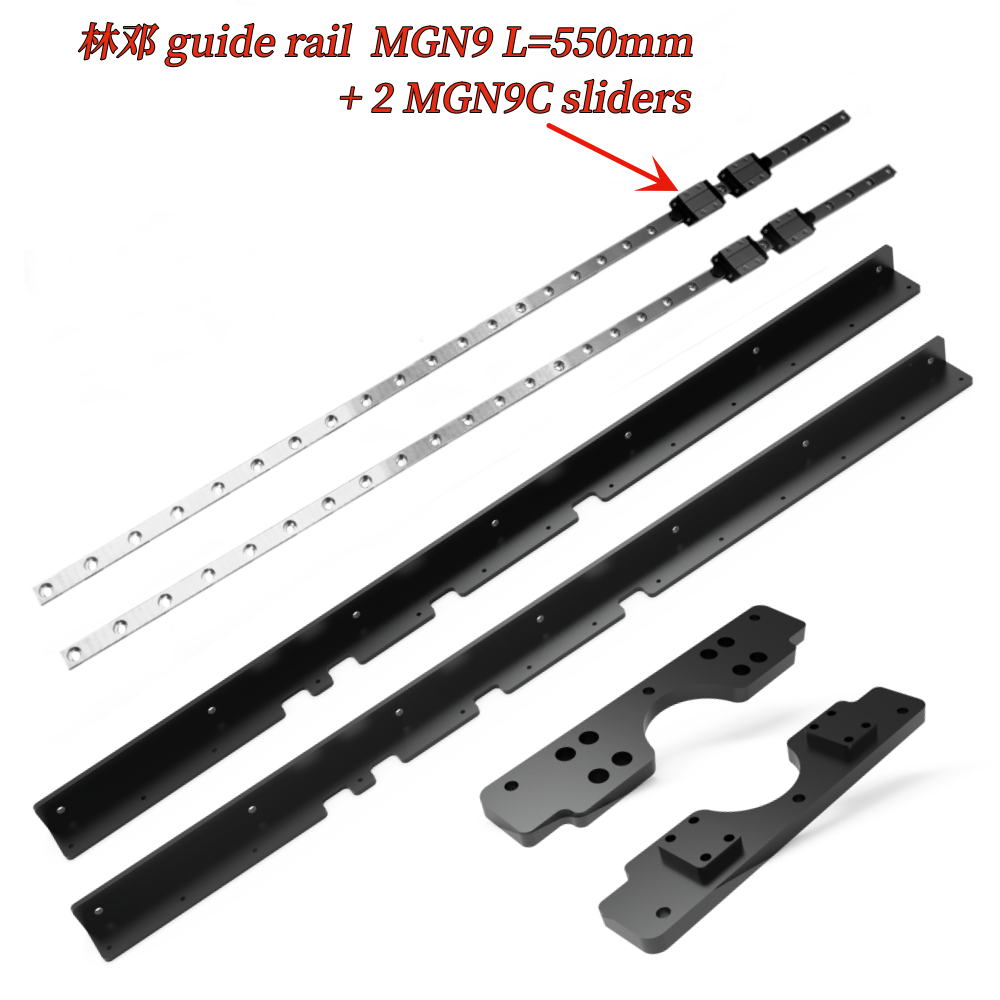
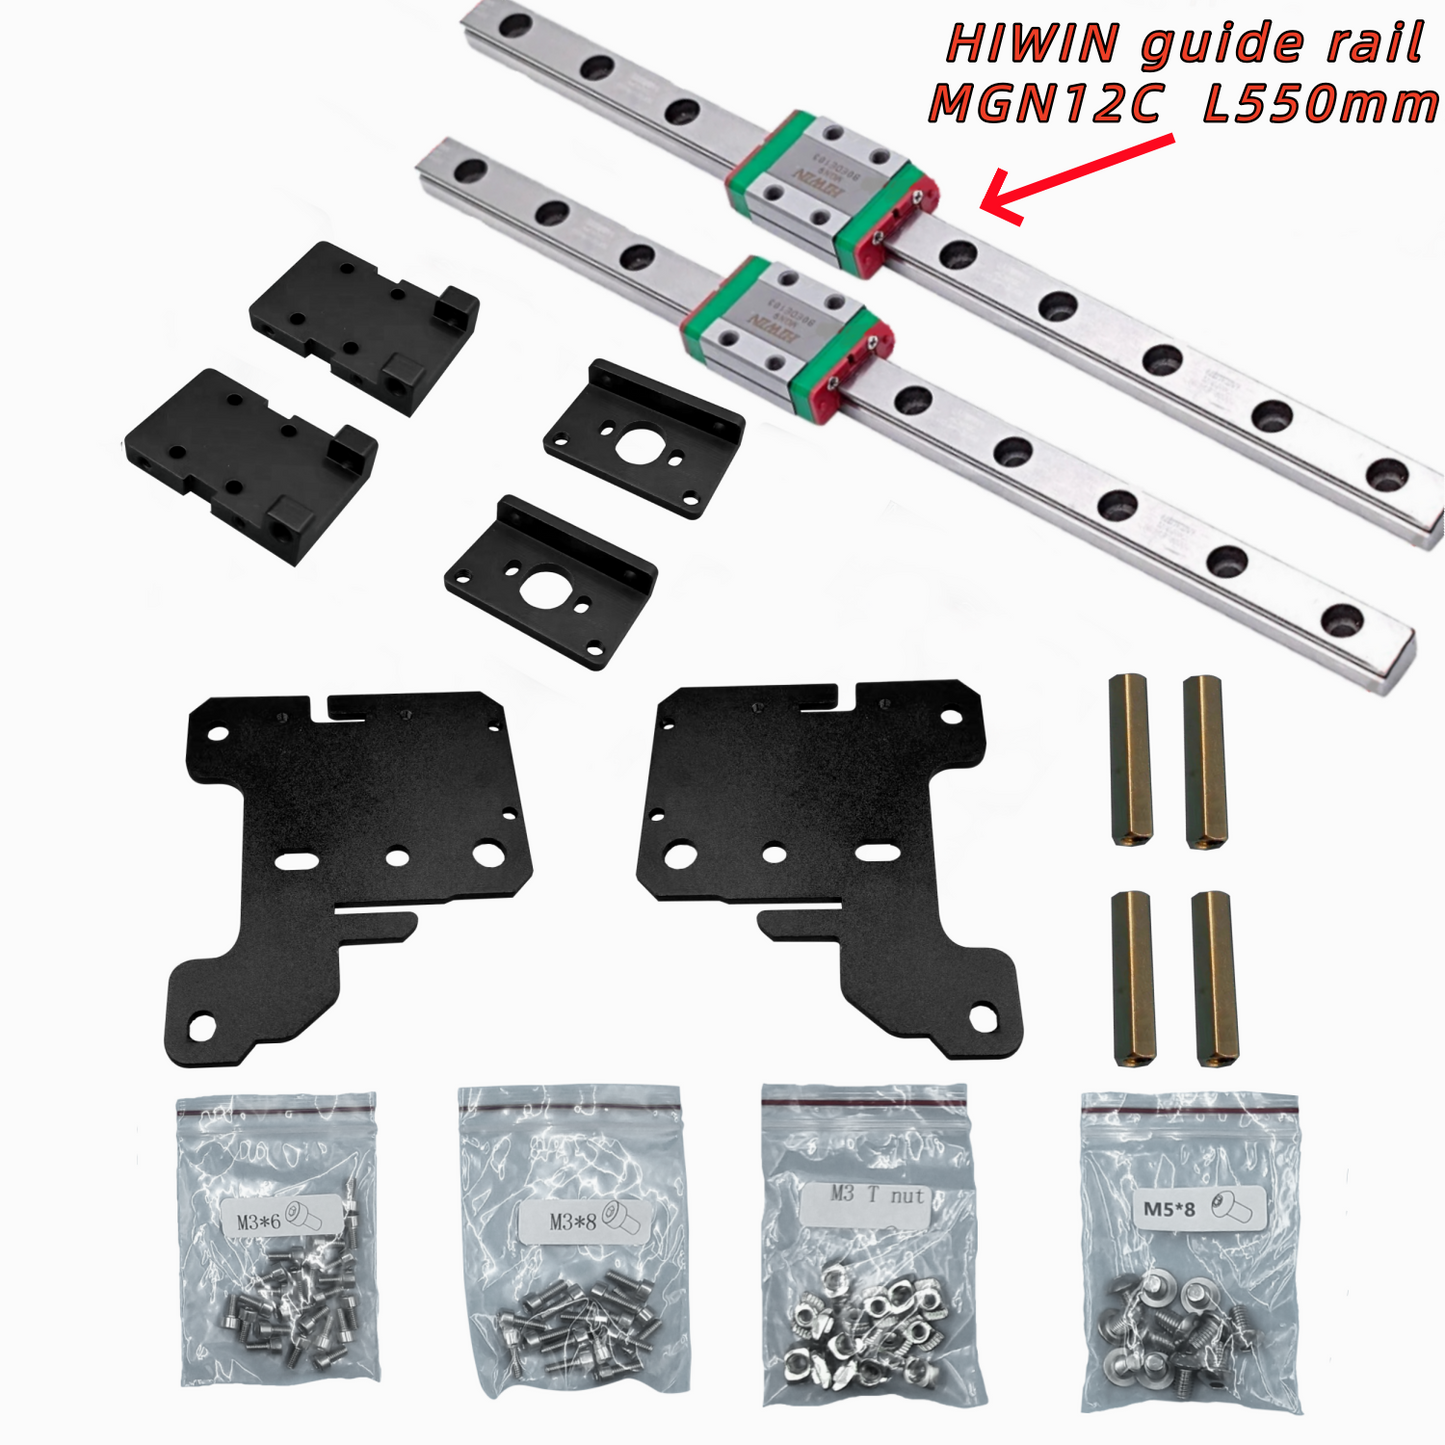
Y-axis, MGN 9C, length 550mm, with 2 MGN 9C sliders. Quantity: 2 sets.
Z-axis, MGN 12C, length 550mm, with 1 MGN 12C sliders, Quantity: 2 sets.
3.Easy to install, retaining as many original machine parts as possible, and the machine's motion size (printable size) will not be lost after installation.
This product can effectively solve the following problems:
1. The problem of POM wheels causing hair and powder friction.
2. The need to adjust the POM wheel every once in a while, and not knowing how to adjust it correctly.
3. Provide a hardware foundation for stable and fast printing, such as if you need to use klipper.
Product images.


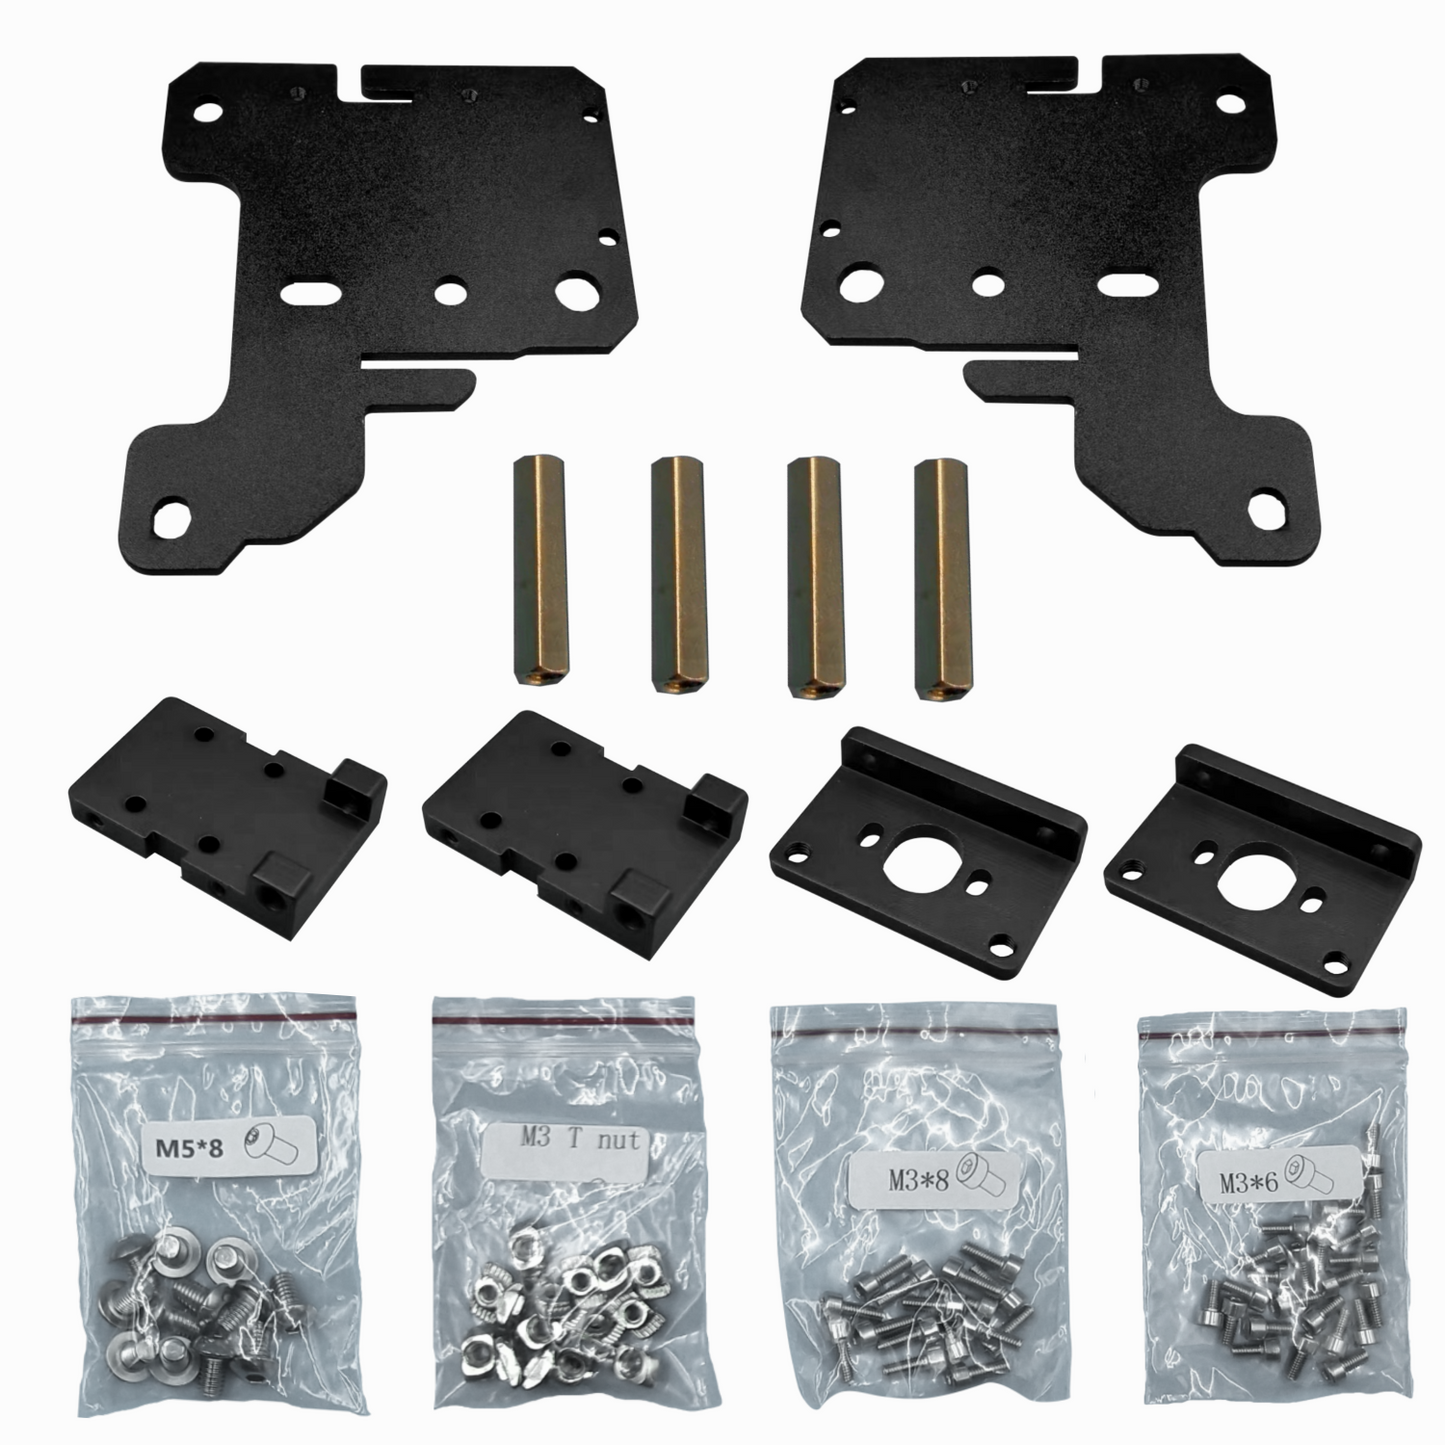
For the Y-axis, add silicone washers and M3*12 screws to replace the copper standoffs. This can simplify the installation steps and ensure smoother slider operation. Please note that after all the screws are threaded in, gradually tighten them. Once the installation is complete, test the slider's movement for smoothness. If it's not smooth, you can loosen the screws slightly.
Precautions:
Do not let the slider slide out of the guide rail, as this may damage the slider. When assembling, do not completely tighten all the screws of the same part. Wait until all the screws of the part are partially screwed in before tightening them completely.
For the first-time use, it is recommended to apply some sewing machine oil on the rails.
After installation is complete, you need to level the platform first before starting the printing process.
Product Categories:
X-axis upgrade guide rail kit (HIWIN guide): Including a set of HIWIN linear guides, X-axis mounting brackets (2 types), and screw packs.
X-axis upgrade guide rail kit (林邓 guide rail): Including a set of 林邓 linear guides, X-axis mounting brackets (2 types), and screw packs.
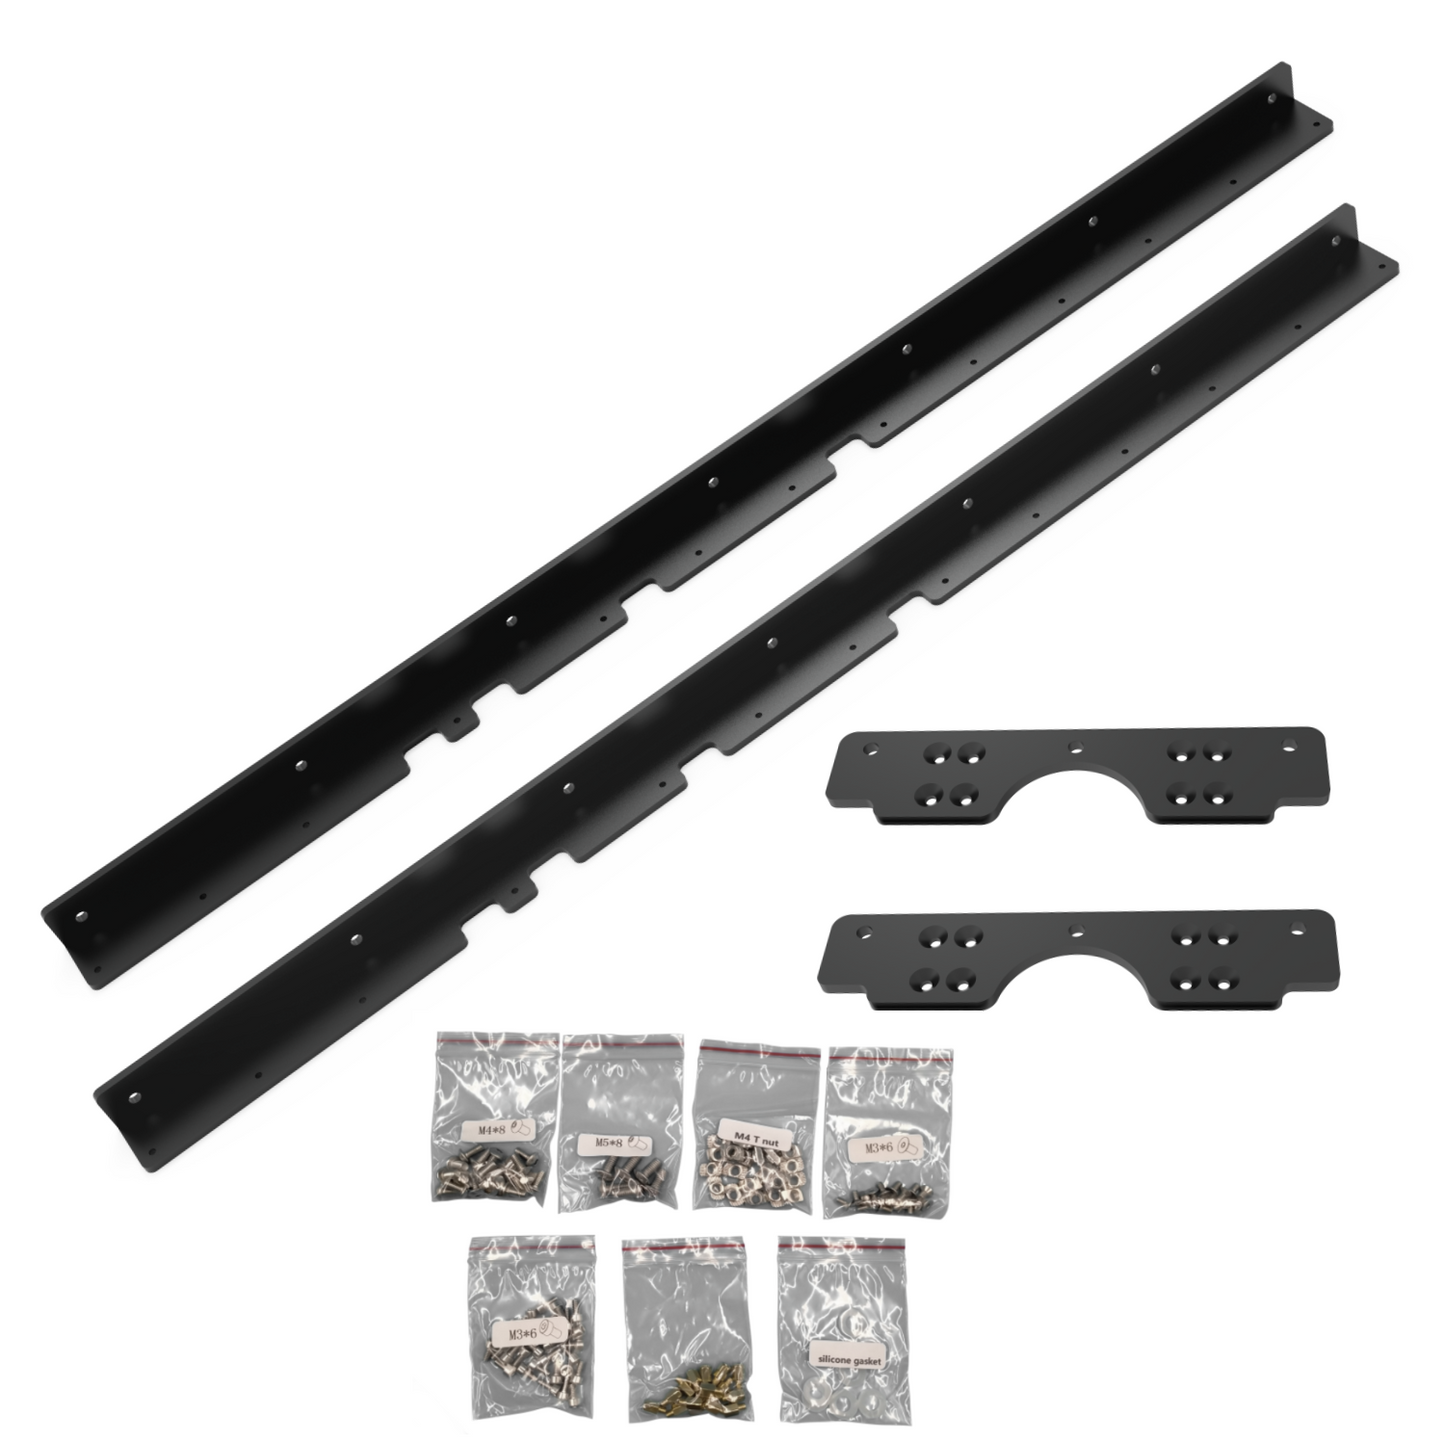
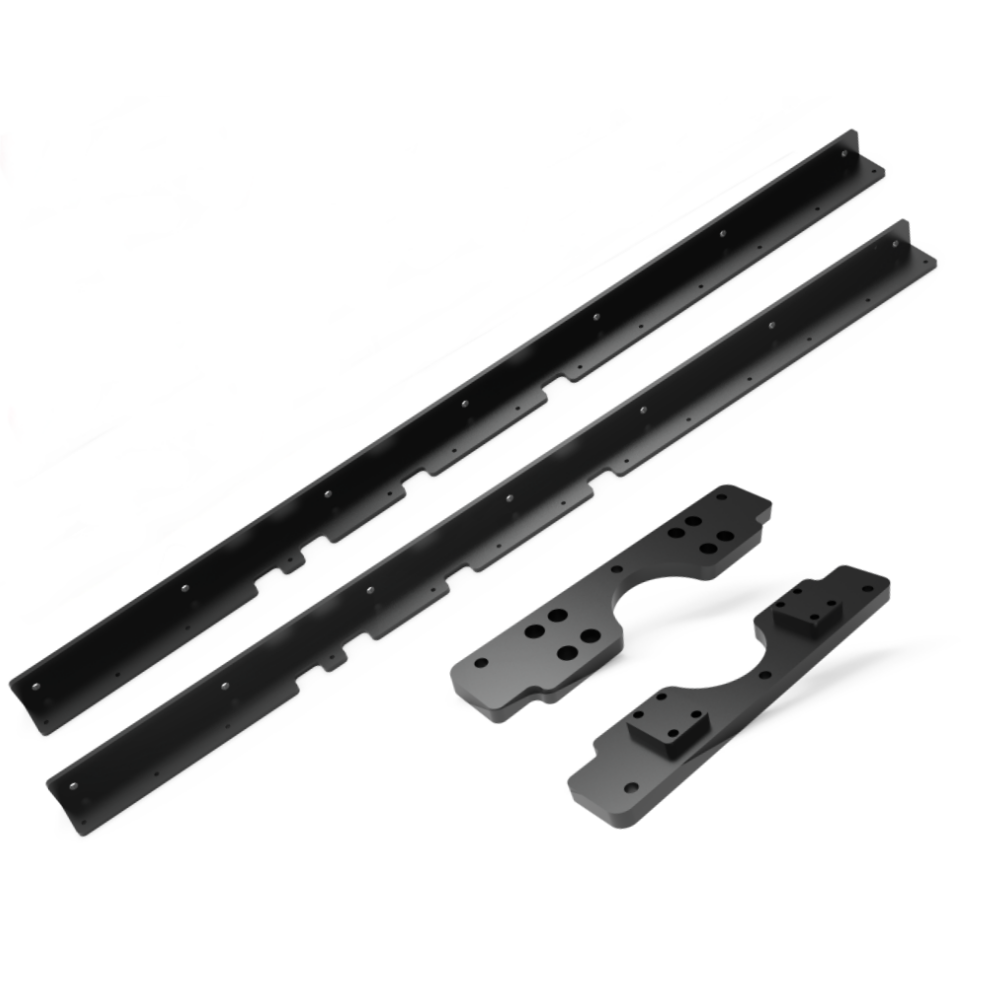
Y-axis upgrade guide rail kit (HIWIN guide): Including two sets of HIWIN linear guides, Y-axis mounting brackets (3 types), and screw packs.
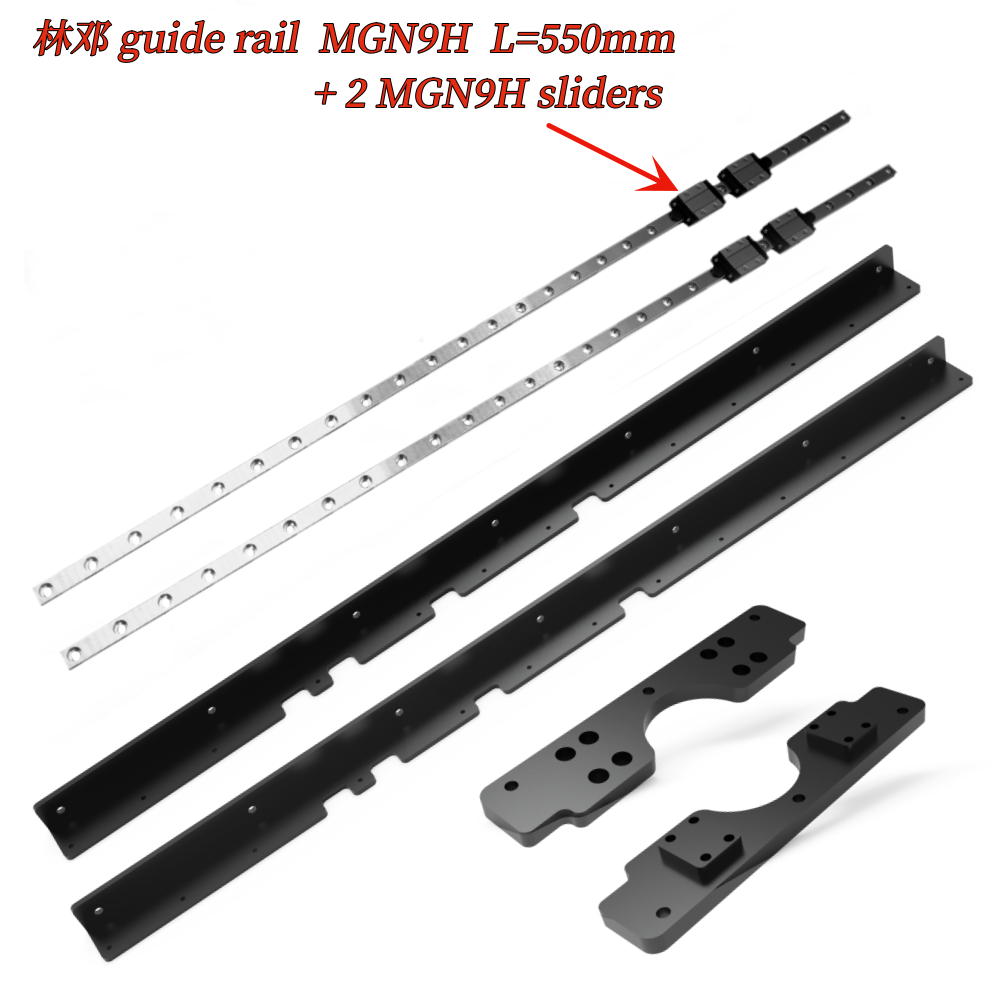
Y-axis upgrade guide rail kit (林邓 guide rail): Including two sets of 林邓 linear guides, Y-axis mounting brackets (3 types), and screw packs.
Z-axis upgrade guide rail kit (林邓 guide rail): includes two sets of 林邓 linear guide rails, Z-axis installation brackets (3 types), and screw packs.
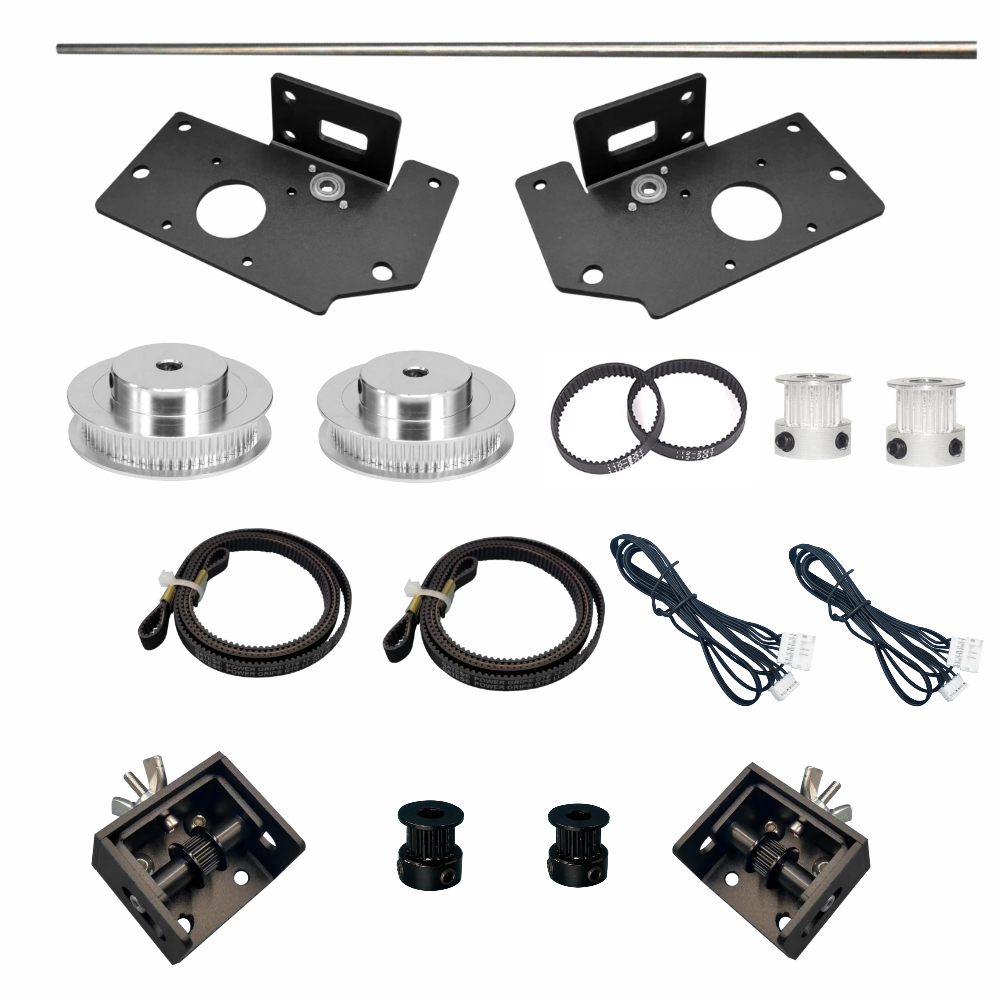
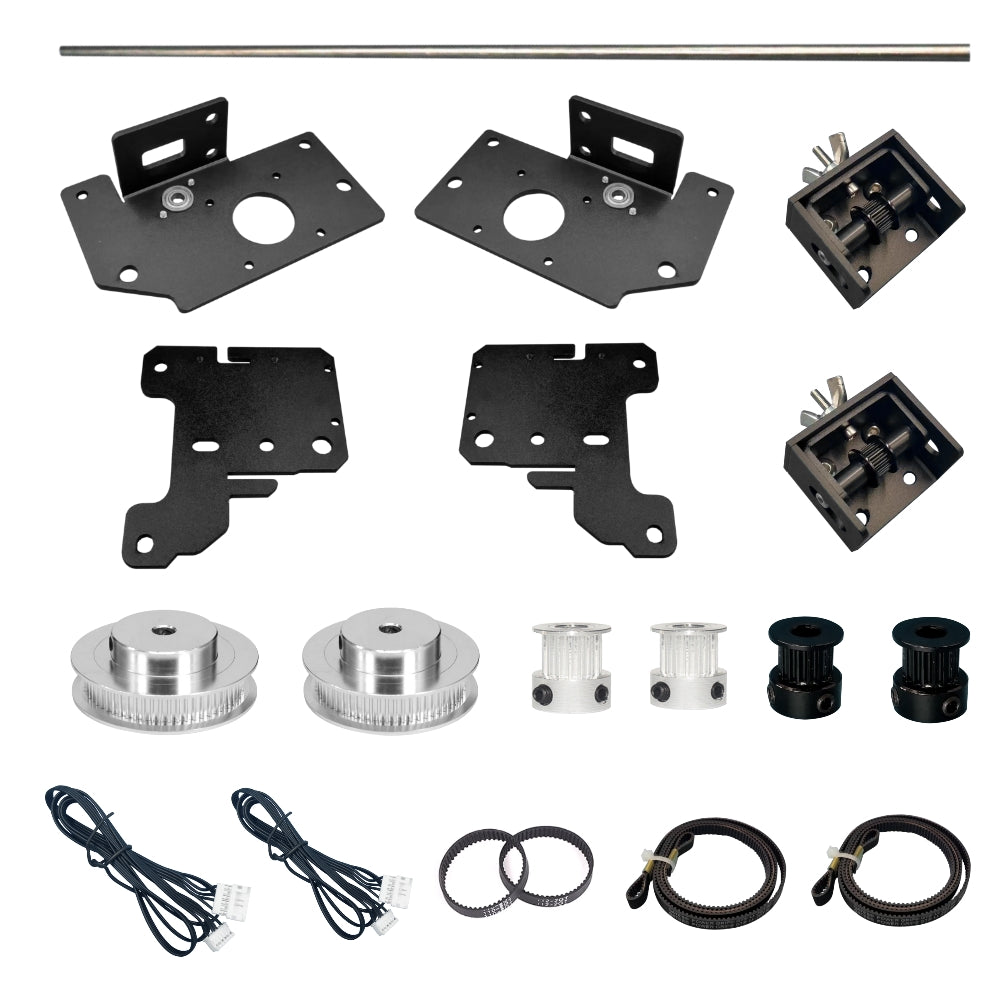
Z-axis Dual Synchronous Belt Kit: Includes upper bracket, lower adjustment bracket, drive shaft, 3 types of timing pulleys, circular timing belt, open timing belt (Gates), motor extension cable, auxiliary materials (screws, zip ties, isolation pillars, etc.).
This kit is suitable for machines that have already been upgraded with Z-axis linear guides and is not suitable for original equipment.The purpose of this upgrade kit: Replaces the original lead screw transmission with synchronous belt transmission, reducing printing layer lines caused by lead screw transmission, and minimizing the noise of lead screw transmission.
Installation instructions.
X-axis video installation: https://www.youtube.com/watch?v=RiGo3FJgR-s
New Y-axis text and image version instruction manual : https://drive.google.com/file/d/1lFRrJQBim_QRhJz5KVcxkJaKTQWuev97/view?usp=sharing
New Y-axis Installation Video : https://youtu.be/qe8u5n4EDzM
Z-axis video installation: https://www.youtube.com/watch?v=fTcugIkf1Qo&t=186s
Z-axis Linear Rail Adjustment Guide: https://youtu.be/i8OUPY9MLNo
Z-axis dual synchronous belt installation: https://youtu.be/48fNaNiPwuk?si=0yq4lc6EN_lVxELp
Diagonal Brace Kit Installation Video : https://www.youtube.com/watch?v=F9egfky-564&t=73s
Our enthusiastic American customer, S&M Makers, has created an extremely detailed installation video for the Neptune 3 Max XY axis upgrade linear rail. You can find the video link here: https://www.youtube.com/watch?v=sALlLdO-U8s&t=1216s. Many thanks to S&M Makers.
During the installation process, please note that the step mentioned in the video between 14 minutes and 33 seconds to 15 minutes and 56 seconds, which suggests creating an additional notch in the mounting bracket, is not necessary in the actual installation. Using the mounting hole in the short beam as the first hole is sufficient.